Welcome to your go-to guide on using concrete for pavers in NZ. If you’re planning to upgrade your driveway, garden path, or patio, choosing the right base material is key, and concrete is one of the most popular options for good reason. It’s durable, cost-effective, and built to handle New Zealand’s changing weather. In this article, you’ll learn why concrete works so well for pavers, what type of mix to use, how to lay them properly, and what it’ll cost. Whether you’re a first-time DIYer or just exploring options, this guide will help you make smart, confident decisions.
Concrete for pavers in NZ is a durable and cost-effective choice for driveways, patios, and garden paths. It handles New Zealand’s climate well, provides a solid base, and works with both poured and precast pavers. The ideal concrete mix includes cement, sand, gravel, and water, often in a 1:2:3 ratio. For best results, use a compacted base, lay pavers evenly, and seal them to extend their lifespan.
- Why Concrete Is A Popular Choice For Pavers In NZ
- Understanding The Types Of Concrete Pavers
- What’s The Best Concrete Mix For Pavers?
- What Strength (MPa) Is Ideal For Residential Pavers?
- How To Lay Concrete Pavers (Step-By-Step)
- Concrete Base Vs Other Base Materials
- Cost Of Installing Concrete Pavers In NZ
- Maintenance And Longevity
- Should You DIY Or Hire A Professional?
- FAQs: About Concrete For Pavers In NZ
- Conclusion
Why Concrete Is A Popular Choice For Pavers In NZ
Concrete remains one of the most trusted materials for paving projects across New Zealand. Whether you’re upgrading a patio, laying a new driveway, or adding definition to your garden, concrete pavers offer a balance of durability, affordability, and ease of use that suits both homeowners and professionals alike.
One of the main reasons concrete is so widely used is its durability in New Zealand’s unique climate. Across the country, weather conditions can shift dramatically, with frequent rain, coastal moisture, intense summer heat, and occasional frost all taking a toll on outdoor surfaces. Concrete handles these conditions well. When mixed and installed properly, it resists cracking, fading, and surface damage. Compared to other paving materials, like natural stone or brick, concrete stands up better to wet winters and UV-heavy summers without constant upkeep.
Affordability is another strong reason concrete continues to lead the market. It offers a cost-effective solution without sacrificing strength or appearance. While stone and tile pavers can quickly increase a project’s budget, concrete gives you the look and function you need at a lower cost per square metre. This makes it ideal for large areas like driveways, courtyards, and footpaths. For homeowners on a budget or those planning DIY projects, concrete pavers offer real value.
Maintenance is also simple. Unlike other materials that require regular sealing or deep cleaning, concrete pavers can be kept clean with a broom and a garden hose. Stains can be removed with mild detergent, and any moss or mildew can be handled with a scrub and a bit of elbow grease. In the rare case a paver cracks or shifts, it can be replaced individually without disturbing the entire surface.
Concrete pavers are versatile and used in many areas around the home. You’ll find them in front yards, backyard patios, footpaths, and around garden beds. They also work well for driveways thanks to their load-bearing strength. Their uniform shape makes layout and installation easier, especially for those attempting their first paving job. You can choose from different finishes, smooth, textured, or even patterned, to match your outdoor style.
In short, concrete remains the go-to material for pavers in NZ because it’s strong, affordable, low-maintenance, and adaptable. It delivers long-lasting results that work in real-world conditions, especially when weather and wear are major factors. Whether you’re planning a big landscape design or just improving your front walkway, concrete pavers are a smart, reliable choice.
Understanding The Types Of Concrete Pavers
When choosing the right materials for your paving project, it’s important to understand the types of concrete pavers available in New Zealand. Each type offers unique benefits in terms of style, durability, and installation method. Whether you’re paving a garden path, patio, or driveway, selecting the right paver can make a noticeable difference in how your outdoor space looks and performs over time.
Plain Concrete Pavers
Plain concrete pavers are simple, clean, and cost-effective. They usually come in standard shapes like squares or rectangles and are commonly used for functional areas such as driveways, footpaths, or side yards. While they may not offer the decorative appeal of coloured or textured options, their low cost and easy availability make them a go-to for budget-conscious projects. Many homeowners also choose plain pavers as a base layer or for areas that don’t need visual impact.
Textured Or Coloured Pavers
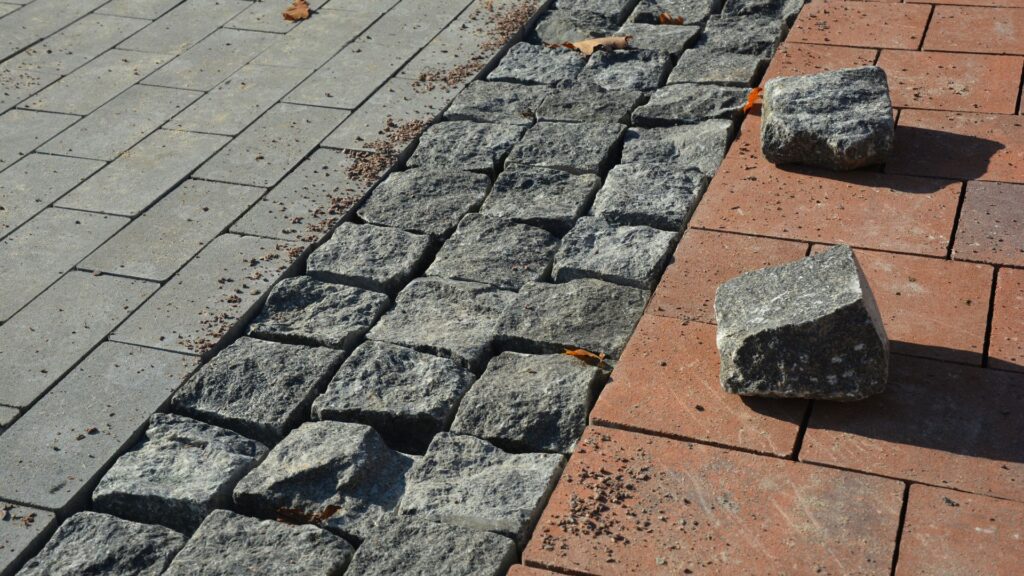
For those who want to add personality to their landscape, textured or coloured pavers offer more design flexibility. These pavers come in various shades, such as charcoal, terracotta, and sand, and often mimic the look of stone, brick, or tile. Some have anti-slip textures that make them ideal for poolside areas or garden paths that stay wet during the rainy season. Coloured pavers are also UV-treated, so they hold up better under the harsh New Zealand sun without fading quickly.
Poured Vs Precast Options
Another important distinction lies between poured and precast concrete pavers. Poured pavers are made on-site by pouring wet concrete into moulds directly on the ground. This allows for custom shapes and patterns but takes more time to install and cure. On the other hand, precast pavers are factory-made and cured under controlled conditions. They’re consistent in size, shape, and strength, making them easier to transport and install. For DIYers or professionals working on tight schedules, precast options offer a reliable and time-saving solution.
Visual Comparison
To help you visualise the difference, imagine a plain grey paver used on a side path next to a fence, functional, neat, and simple. Now picture a terracotta-coloured, textured paver lining a garden walkway with lush greenery on both sides. The contrast in appearance, feel, and effect is clear. Similarly, a poured concrete section may follow a curved edge seamlessly, while precast blocks might provide a sharp, geometric structure.
By understanding these paver types, you can make a smarter decision based on your space, style, and budget. Whether you need practical function or aesthetic value, there’s a concrete paver suited for every New Zealand outdoor project.
What’s The Best Concrete Mix For Pavers?
Choosing the right concrete mix is a big deal if you’re planning to install pavers that last. Whether you’re working on a small patio or a full driveway, using the correct ratio of ingredients and understanding the right concrete strength can make or break your project, literally. Here’s a breakdown of what you need to know.
Basic Concrete Mix Ratio (Cement, Sand, Gravel, Water)
For most paver installations in New Zealand, a standard concrete mix works well. The commonly used ratio is 1 part cement, 2 parts sand, and 3 parts gravel, with just enough water to make the mix workable but not soupy. This mix offers a strong and stable base or can be used to make your own pavers. Make sure each component is clean and free of debris. Too much water will weaken the concrete, and too little will make it hard to work with.
You’ll know you’ve got the right consistency when the mix holds its shape without crumbling or sagging. It should be firm but pliable, like a stiff batter. This balance ensures the concrete cures evenly and resists cracking under load.
Pre-Mix Vs Custom-Mix: Which Is Better?
You’ve got two options: buy pre-mixed concrete or create your own mix from raw materials. Both have pros and cons.
- Pre-mix concrete is convenient. You can buy it in bags from local suppliers like Mitre 10, Bunnings Warehouse, or PlaceMakers. These are already balanced for general-purpose use. Just add water, mix, and you’re ready to go. It’s ideal for small projects or if you don’t want to stress over measurements.
- Custom-mix concrete gives you more control. You can tweak the sand-to-gravel ratio or add additives like plasticisers for flexibility. If you’re working on a larger area or need a specific strength rating, mixing your own can be more cost-effective and precise.
If you’re not confident about ratios or additives, go with pre-mix. If you’re experienced or working with a pro, custom-mix offers flexibility.

What Strength (MPa) Is Ideal For Residential Pavers?
In New Zealand, concrete strength is measured in MPa (megapascals). For residential use, such as patios, walkways, or garden paths, a 20 MPa mix is usually enough. It holds up well to foot traffic and light loads.
If you’re laying pavers for driveways or parking areas, consider a 25 MPa or higher mix. This added strength resists cracking and handles the pressure of cars or heavy garden gear.
Always check the bag or product specs if you’re buying pre-mix. Most general-purpose bags in NZ are 20 MPa unless labeled otherwise. If you’re ordering ready-mix concrete for a large project, you can request a specific MPa rating from your supplier.
Trusted Concrete Brands And Suppliers In NZ
You don’t need to look far to find quality concrete products in New Zealand. Here are some reputable options:
- Firth Concrete – One of NZ’s most trusted names. They offer pre-mix bags and ready-mix deliveries.
- Holcim New Zealand – Supplies bulk concrete for residential and commercial projects.
- PlaceMakers – Sells concrete mix and building supplies across the country.
- Bunnings Warehouse – Offers pre-mix concrete in different bag sizes, ideal for small DIY jobs.
- Mitre 10 Mega – Good for both ready-to-use and component-based concrete mix products.
If you’re unsure, talk to the staff at these stores. They’ll usually guide you to the right product for your project size and conditions.
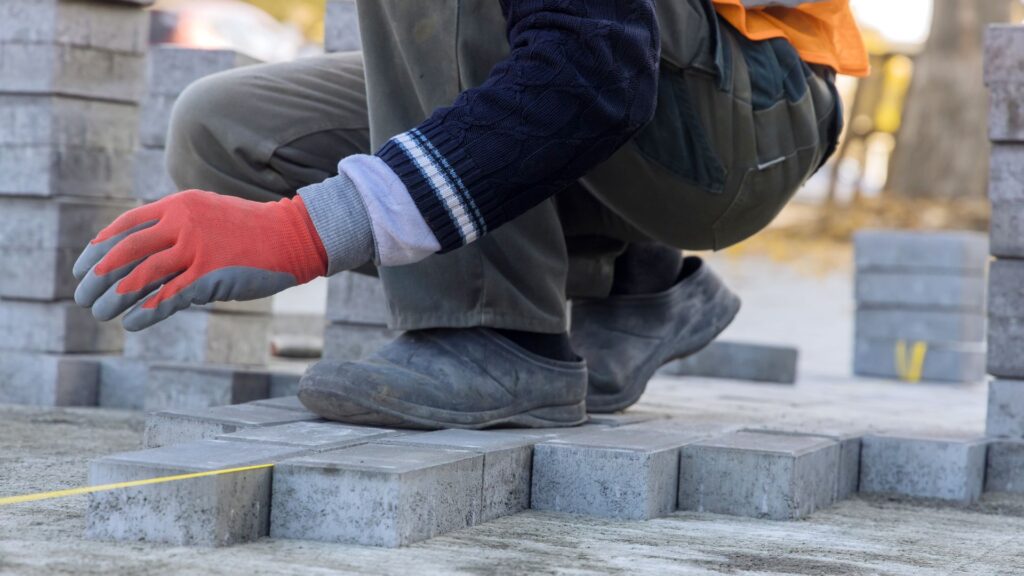
How To Lay Concrete Pavers (Step-By-Step)
Laying concrete pavers might seem like a big job, but it becomes manageable when you break it down into simple, clear steps. Whether you’re building a new patio, driveway, or garden path, following the right method helps you get long-lasting results. This section walks you through the full process, from planning to finishing, so you can lay your pavers with confidence and avoid costly mistakes along the way.
Planning And Measuring The Area
Start by deciding exactly where you want your pavers to go. Use a tape measure and stakes with string to mark out the area. Double-check your dimensions to ensure you’re buying the right number of pavers and base materials. Don’t forget to allow for slight gaps between pavers and some space beyond the edges to secure the border. Planning also includes checking the slope for water drainage. You want a gentle fall, around 1–2% grade, so water doesn’t pool on your surface.
Preparing The Base: Gravel, Sand, Or Concrete?
The base you choose plays a big role in how your pavers perform over time. In New Zealand, where the ground can shift due to moisture and temperature changes, a solid, well-compacted base is essential. For most residential applications, a combination of compacted gravel (around 100mm thick) topped with bedding sand (20–30mm thick) works well. Use GAP 20 or crushed stone for the gravel layer. If you’re installing in a high-traffic area like a driveway, consider pouring a concrete base for extra strength. Make sure each layer is compacted properly using a plate compactor to avoid sinking or unevenness later.
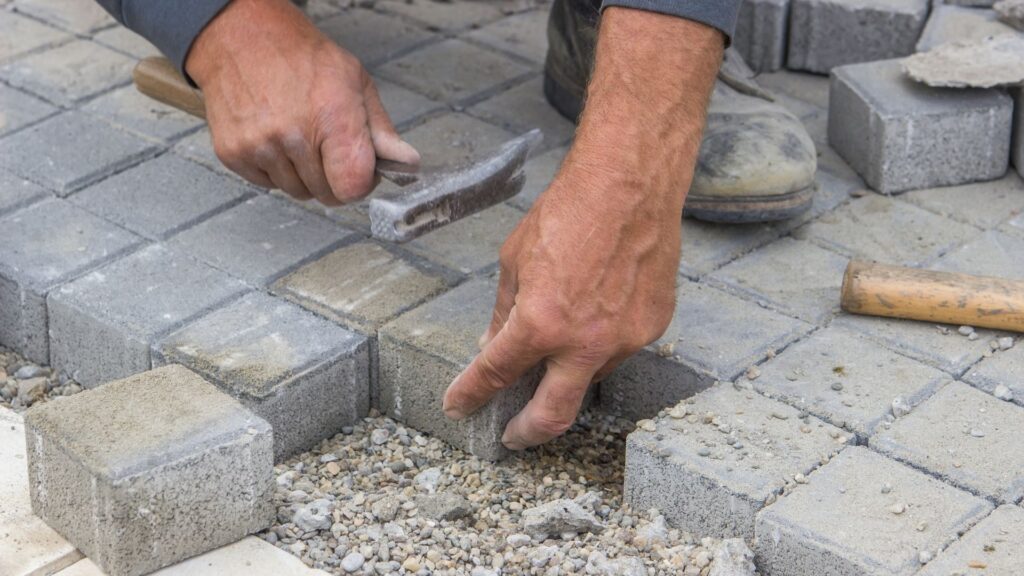
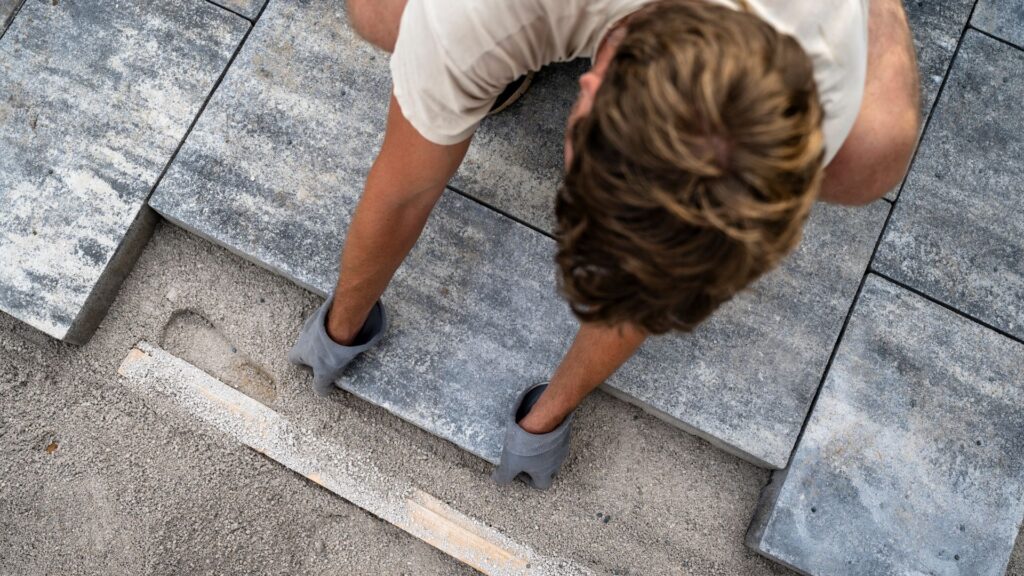
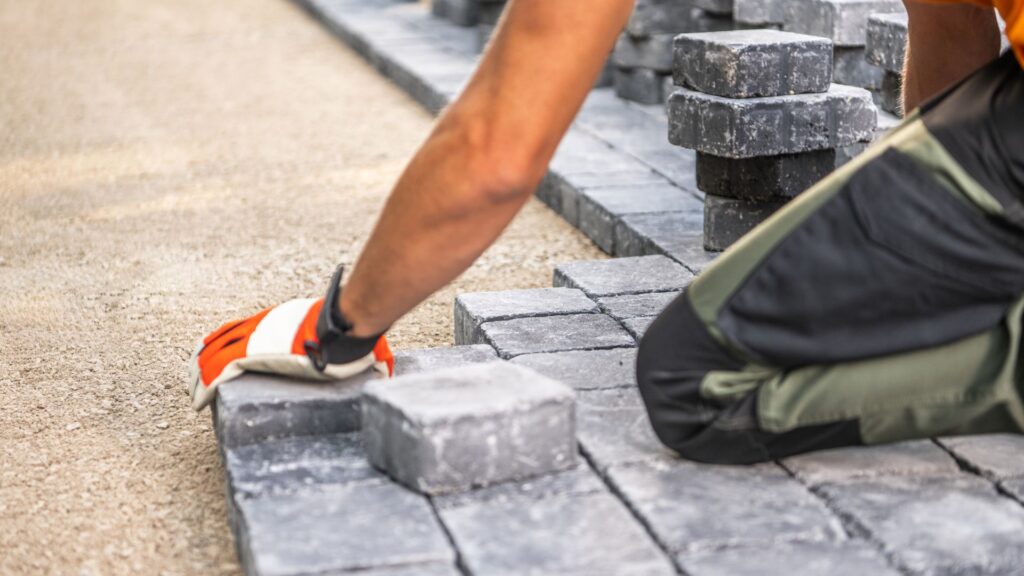
Laying The Pavers Evenly
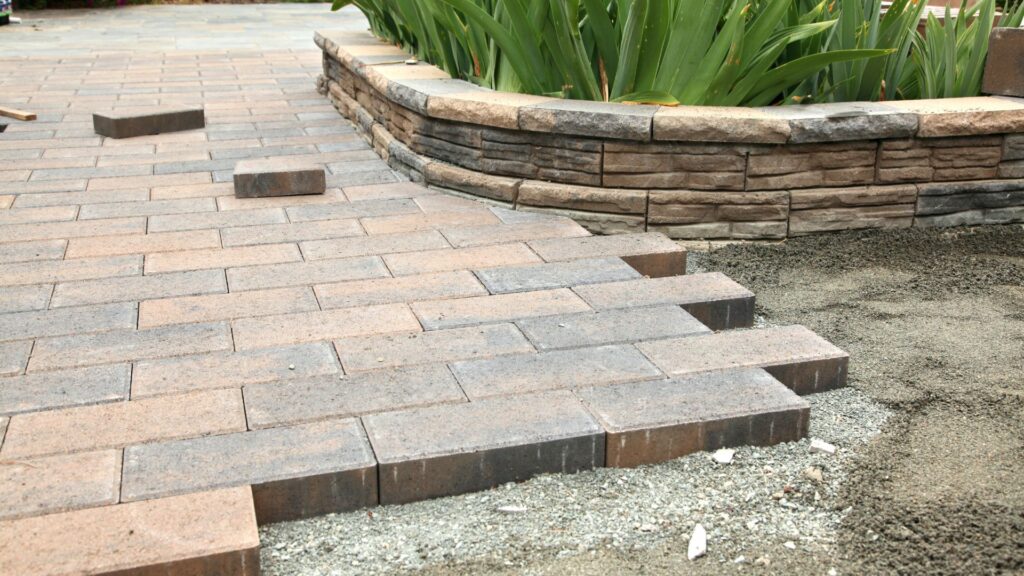
Once your base is level and compacted, start laying the pavers from one corner, preferably along a straight edge. Place each paver gently onto the bedding sand, keeping the spacing consistent. You can use plastic spacers or a rubber mallet to adjust alignment without damaging the surface. Use a string line to keep rows straight. After laying each row, step back and check the pattern from a distance. Adjust as needed before moving to the next row. Continue until the entire area is covered, making cuts with a masonry saw for edges or tricky corners.
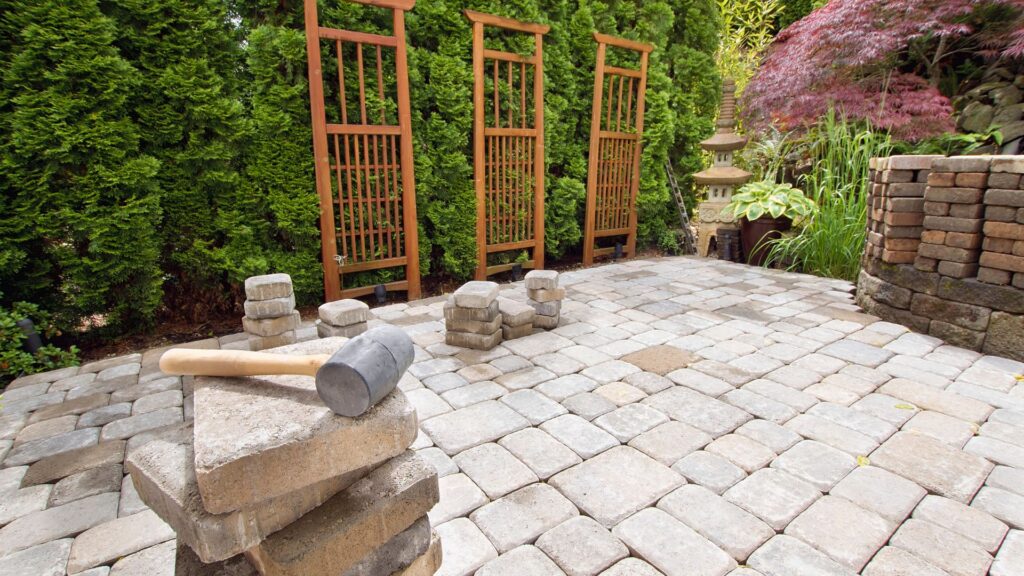
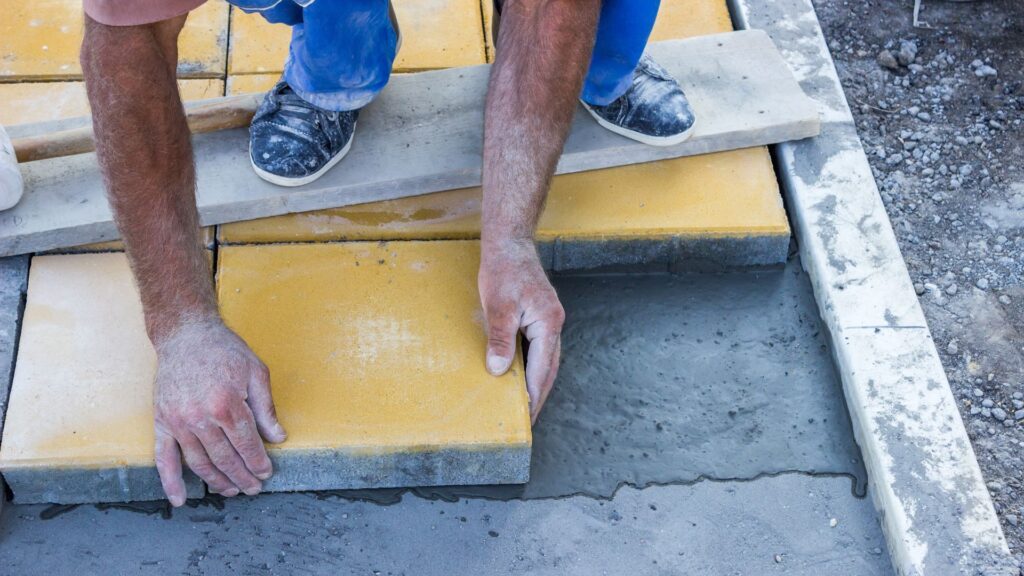
Joint Filling And Sealing
After all pavers are laid, it’s time to lock them in place. Sweep fine sand or polymeric sand into the joints between the pavers. Polymeric sand hardens when moistened and helps prevent weed growth and ant infestation. After the sand is brushed in, use a compactor to gently settle the pavers into the base. Sweep in more sand as needed. Once joints are full and compacted, consider applying a paver sealer. Sealing improves appearance, prevents staining, and extends the life of the surface, especially in damp or frost-prone NZ regions.
Curing And Maintenance Tips
Concrete pavers don’t require curing like poured concrete, but if you’ve poured a concrete base, let it cure for at least 7 days before adding any weight. After installation, ongoing maintenance is simple. Clean the surface regularly with water and a stiff broom. Refill joints annually if needed, especially after heavy rain or frost. Reapply sealer every 2–3 years for best results. Inspect for uneven areas or shifting pavers and fix early to avoid long-term issues.
Tip Box: Common Mistakes To Avoid When Laying Concrete Pavers
- Skipping base preparation leads to sinking and uneven pavers.
- Poor drainage planning can cause water pooling and frost damage.
- Using unwashed sand or gravel introduces moisture and instability.
- Rushing the compaction process weakens the base structure.
- Forgetting edge restraints allows pavers to shift over time.
- Not sealing the surface increases the risk of moss, algae, and stains.
By following these steps carefully, you’ll create a strong, durable paver surface that looks great and stands up to New Zealand’s weather conditions. Taking the time to plan, prepare, and finish properly ensures your concrete pavers will stay in place and look good for years to come.
Concrete Base Vs Other Base Materials
When laying pavers in New Zealand, the base you choose is just as important as the pavers themselves. Two of the most common base options are solid concrete and crushed stone (also known as aggregate or compacted base). Each has its own strengths, weaknesses, and best-use scenarios. Understanding the differences will help you make a smarter decision for your outdoor project.
Concrete Vs Crushed Stone Base
A concrete base is a solid, poured slab that provides a fixed foundation for pavers. It’s often used for driveways, pool surrounds, and areas that carry heavy loads. Crushed stone, on the other hand, is a flexible base made from layers of compacted gravel or crushed rock. It’s popular for patios, garden paths, and light-use areas.
Pros And Cons Of Each
Concrete Base Pros:
- Strong and long-lasting, ideal for heavy traffic.
- Minimises shifting, making pavers more stable.
- Less likely to sink or develop low spots over time.
Concrete Base Cons:
- More expensive and labour-intensive to install.
- Poor drainage if not properly sloped.
- Harder to repair or replace individual pavers.
Crushed Stone Base Pros:
- Cost-effective and easier for DIY installation.
- Allows for better drainage and reduces water pooling.
- Easier to remove and relevel pavers if needed.
Crushed Stone Base Cons:
- May settle unevenly over time if not compacted correctly.
- Weeds can grow through the joints without proper sand or sealing.
- Not suitable for heavy vehicle loads without reinforcement.
When To Choose A Solid Concrete Base
Use a concrete base if you’re installing pavers in areas with constant vehicle use, like driveways or garages. It’s also a smart choice when you want a clean, flat surface that won’t shift with time. Solid bases are great for pool decks or high-end patios where precision and permanence matter.
If you’re building a path or patio that sees mostly foot traffic, a crushed stone base is usually enough. It saves money, handles drainage well, and offers flexibility for future changes.
NZ-Specific Conditions To Consider
New Zealand’s climate and geography bring unique challenges. In areas with frequent rain, a crushed stone base supports drainage better and prevents water buildup under the pavers. But in earthquake-prone regions like Wellington or Christchurch, a solid concrete base might crack under stress, while a flexible crushed base could absorb ground movement better.
Coastal areas also need extra care. High salt levels can wear down concrete faster, especially if it’s not sealed. A gravel base with sealed pavers can help extend lifespan and reduce long-term maintenance.
Choosing between concrete and crushed stone comes down to your project goals, the expected weight load, and local conditions. Always plan with drainage, movement, and long-term stability in mind.
Cost Of Installing Concrete Pavers In NZ
Understanding the cost of installing concrete pavers in New Zealand is essential before starting your project. Whether you’re planning a small garden path or a full driveway, knowing what to expect helps you stay within budget and avoid surprises. Below is a detailed look at typical prices, material costs, and where to source your supplies based on location.
Average Costs (DIY vs Hiring A Pro)
If you’re planning a do-it-yourself (DIY) project, the average cost for installing concrete pavers in NZ ranges from $60 to $100 per square metre. This includes the cost of materials like pavers, base layers, and tools, but not your time or labour.
On the other hand, hiring a professional can push that cost to $120 to $180+ per square metre. This covers everything, materials, labour, equipment, and finishing. The higher price reflects expertise, quality assurance, and time savings. For larger or more complex areas like sloped driveways or paved patios with curves, hiring a professional might be the smarter long-term investment.
Material Cost Breakdown (Pavers, Base, Sealant, Tools)
When estimating costs, it’s important to break down each element:
- Concrete Pavers: Expect to pay between $30 to $60 per square metre, depending on style, texture, and strength. Basic grey pavers cost less, while coloured or patterned pavers cost more.
- Base Layer: You’ll need compacted gravel or crushed stone as a base, which costs around $10 to $20 per square metre. If you’re adding a concrete slab underneath, budget more.
- Sand or Bedding Mix: Budget around $5 to $10 per square metre for paving sand or mortar mix, used for levelling the base.
- Sealer: A quality paver sealant costs $60 to $100 per 4L, covering approximately 15 to 20 square metres. Sealing helps protect the surface from stains and moisture.
- Tools: For DIY projects, you may need to rent a compactor, concrete mixer, or tile cutter. Equipment hire can add $100 to $200, depending on duration and tool type.
Regional Differences (Auckland Vs Wellington Vs Christchurch)
The cost of installing concrete pavers can vary depending on your location in New Zealand:
- Auckland: Typically the most expensive due to higher labour and material costs. Expect professional installation to range between $140 to $180 per square metre.
- Wellington: Slightly more affordable than Auckland. Costs range from $120 to $160 per square metre, depending on terrain and access.
- Christchurch: Usually offers the lowest rates, ranging from $100 to $150 per square metre, thanks to lower demand and competitive pricing among tradespeople.
Keep in mind that delivery fees and access to local suppliers may also influence your final cost.
Where To Buy Concrete Pavers Or Mix In NZ
New Zealand has a wide range of suppliers for concrete pavers and materials. If you’re doing it yourself or simply shopping for the best deal, here are some options:
- Bunnings Warehouse: Ideal for DIYers. Offers a range of basic pavers, premix concrete, and tools in-store and online.
- Mitre 10: Another great option for DIY projects, with a decent range of pavers, bedding sand, and sealers.
- Firth Concrete: A well-known NZ supplier offering high-quality concrete pavers and pre-mixed solutions for larger residential and commercial projects.
- Urban Paving: Based in Christchurch, this supplier provides a wide selection of designer concrete pavers, ideal for patios, driveways, and landscaping.
- Local Landscape Suppliers: Many towns have trusted local yards that supply gravel, sand, pavers, and other materials at competitive rates. These often offer delivery and bulk discounts.
Before buying, compare prices and read reviews. It also helps to check stock availability and ask whether the supplier offers delivery to your area.
By understanding these cost factors, you can make informed choices that fit your budget while getting the best results for your paving project. Whether you’re taking the DIY route or working with a pro, careful planning ensures a smoother process and better value for money.

Maintenance And Longevity
Concrete pavers are a solid long-term investment, especially when properly maintained. In New Zealand, where weather conditions range from heavy rain to intense UV exposure, maintaining your pavers is key to making them last. Below is everything you need to know about how to care for your concrete pavers and keep them looking sharp for years.
How Long Concrete Pavers Last In NZ Conditions
In typical New Zealand climates, well-installed and maintained concrete pavers can last 25 to 40 years. Their durability depends on several factors like the quality of the mix, how well the base was prepared, and how often they’re cleaned and sealed. In coastal areas or regions with frequent freeze-thaw cycles, the lifespan may be slightly shorter if water gets into the joints and expands. Still, with good upkeep, most pavers will hold up well under foot traffic, vehicle load, and seasonal changes.
Cleaning And Sealing
Regular cleaning keeps your pavers looking good and helps prevent long-term damage. Sweep away dirt and debris often to avoid buildup. For deeper cleaning, use a pressure washer on a low setting or a stiff brush with water and mild detergent. Avoid strong chemicals as they can weaken the surface over time.
Sealing is an important step that many homeowners skip. A high-quality sealer protects the surface from stains, moisture, and UV damage. In New Zealand’s wet winters and sunny summers, sealing once every 2 to 3 years is recommended. It also brings out the color in textured or decorative pavers, making your outdoor space look newer for longer.
Repairing Cracked Or Sunken Pavers
Even with the best installation, occasional repairs may be needed. Cracks can appear from ground movement or excessive weight. Small cracks can be filled with a concrete repair compound, but larger issues may need a full paver replacement. The good news is that individual pavers can be lifted and swapped without redoing the entire area.
Sunken pavers are often a result of poor drainage or an unstable base. If you notice any areas dipping, remove the paver, re-level the base with compacted gravel or sand, and reinstall. Regularly checking for movement or water pooling helps catch problems early before they get worse.
How To Prevent Weed Growth In Joints
Weeds can quickly take over the gaps between your pavers if left unchecked. Start by using polymeric sand during installation. It hardens when wet, making it tough for weeds to grow. If you already have weeds, remove them by hand or use a weed burner to kill them at the root without chemicals.
After cleaning, reapply sand between joints and compact it properly. Sealing the surface also prevents seeds and moisture from settling in. Keep the area swept and remove organic material like leaves or mulch that can feed unwanted growth.
Regular maintenance not only protects your investment but also keeps your outdoor spaces safe, clean, and attractive. Whether you’ve installed a new patio or are maintaining an older driveway, taking care of your concrete pavers ensures they’ll last for decades.
Should You DIY Or Hire A Professional?
If you’re planning to install concrete pavers in New Zealand, one of the biggest decisions you’ll face is whether to tackle the project yourself or hire a professional. Both options come with clear advantages and potential drawbacks. The right choice depends on your time, budget, skills, and the size of the area you’re working with. Here’s what you need to know to make the best decision for your situation.
DIY: Pros And Cons
Doing it yourself can save you money upfront. If you already have some tools and basic DIY experience, taking on a paver project could be a great way to improve your outdoor space without paying for labour. You get full control over the timeline, design, and finish.
But there are some downsides. DIY paver installation takes time, patience, and physical effort. Mistakes like poor base preparation or uneven pavers can lead to drainage problems, cracking, or shifting over time. Fixing these errors later can cost more than hiring a pro from the start.
What Skills And Tools You’ll Need
If you decide to go the DIY route, you’ll need a few essential skills. These include measuring and leveling the ground, mixing concrete properly, and laying pavers with even spacing. Understanding how to create a solid base and control water drainage is also critical.
As for tools, you’ll likely need:
- A spade or shovel
- Wheelbarrow
- Spirit level
- Tape measure
- Concrete mixer or mixing tools
- Compactor or tamper
- Rubber mallet
- Screed board
- Safety gear (gloves, knee pads, protective eyewear)
If you’re buying or renting tools, factor that into your cost calculations. For larger areas, machinery like a plate compactor becomes essential to ensure the base is firm and long-lasting.
When It’s Worth Paying For Expert Help
Hiring a professional makes sense if you’re working on a large area, a steep slope, or soil that’s difficult to compact. Professionals bring experience, efficiency, and the right equipment. They can spot and solve problems early, saving you time and avoiding costly mistakes. You’ll also get peace of mind knowing the job is done right the first time, which can be especially important for driveways or high-traffic areas.
Another good reason to hire a pro is if your project includes custom cuts, curves, or intricate designs. Skilled installers can deliver a cleaner finish and longer-lasting results. Plus, many offer warranties on workmanship.
If your budget allows and you value convenience and durability, investing in a professional may be the smarter long-term choice.
Ready to start your paving project? Get expert advice, quality materials, and local support , all in one place. Visit us to get started today.
FAQs: About Concrete For Pavers In NZ
A standard mix ratio of 1 part cement, 2 parts sand, and 3 parts gravel with enough water for workability works well. Use a 20–25 MPa strength mix for residential paving.
No, pouring concrete directly onto soil can lead to uneven settling. Always create a compacted gravel or sand base first, then pour the concrete if needed.
Yes, sealing helps protect against water absorption, stains, and moss growth. In NZ’s damp climate, sealing also reduces slipping hazards during wet seasons.
Allow at least 24–48 hours before light foot traffic and 7 days before heavier use. Full curing takes about 28 days for maximum strength and durability
DIY costs range from $60–$100 per square metre depending on materials. Hiring professionals can range from $120–$180+ per square metre, including labour.
Yes, you can lay them on a compacted sand or gravel base using a dry method. Mortar is ideal for areas with heavy traffic or when extra stability is needed.
Concrete pavers are often more affordable and perform well in NZ’s variable weather. They’re also easier to replace and install than natural stone or brick.
For driveways, use pavers at least 50–60mm thick. For walkways and patios, 40–50mm may be sufficient. Thicker pavers offer better load-bearing performance.
Yes, with molds and a strong mix (20–25 MPa), you can DIY your own pavers. Curing and consistency are key. Store-bought options offer faster installation.
Use polymeric sand between joints, seal the surface, and regularly clean the area. Proper compaction and sealing are your best long-term defenses against weeds.
Conclusion
Concrete remains one of the most practical and reliable choices for pavers in New Zealand. Its durability, affordability, and ability to handle harsh weather make it ideal for driveways, patios, garden paths, and more. When installed correctly, concrete pavers can last for decades with minimal maintenance. Before starting your project, take the time to plan carefully, measure the area, choose the right mix, and decide whether DIY or professional help is best for your needs. Rushing the process often leads to uneven surfaces, cracking, or added costs down the line. If you’re unsure where to begin, consider reaching out to a local paving expert, getting a quote, or downloading a free step-by-step checklist to guide you through the process. A well-prepared plan leads to a smoother, longer-lasting result.
About the Author:
Mike Veail is a recognized digital marketing expert with over 6 years of experience in helping tradespeople and small businesses thrive online. A former quantity surveyor, Mike combines deep industry knowledge with hands-on expertise in SEO and Google Ads. His marketing strategies are tailored to the specific needs of the trades sector, helping businesses increase visibility and generate more leads through proven, ethical methods.
Mike has successfully partnered with numerous companies, establishing a track record of delivering measurable results. His work has been featured across various platforms that showcase his expertise in lead generation and online marketing for the trades sector.
Learn more about Mike's experience and services at https://theleadguy.online or follow him on social media: