Welcome to your complete, beginner-friendly guide on how to mix concrete in a mixer in Whangārei, whether you’re tackling a small DIY project, setting fence posts, or pouring a simple slab around your home. Mixing concrete properly is one of those skills that looks straightforward but can quickly go wrong if the ratios, timing, or conditions aren’t right—especially in Whangārei’s humid, changeable climate. In this guide, we’ll walk you through the process in plain language, sharing practical tips, common mistakes to avoid, and local insights so you can achieve strong, durable concrete without the stress or guesswork.
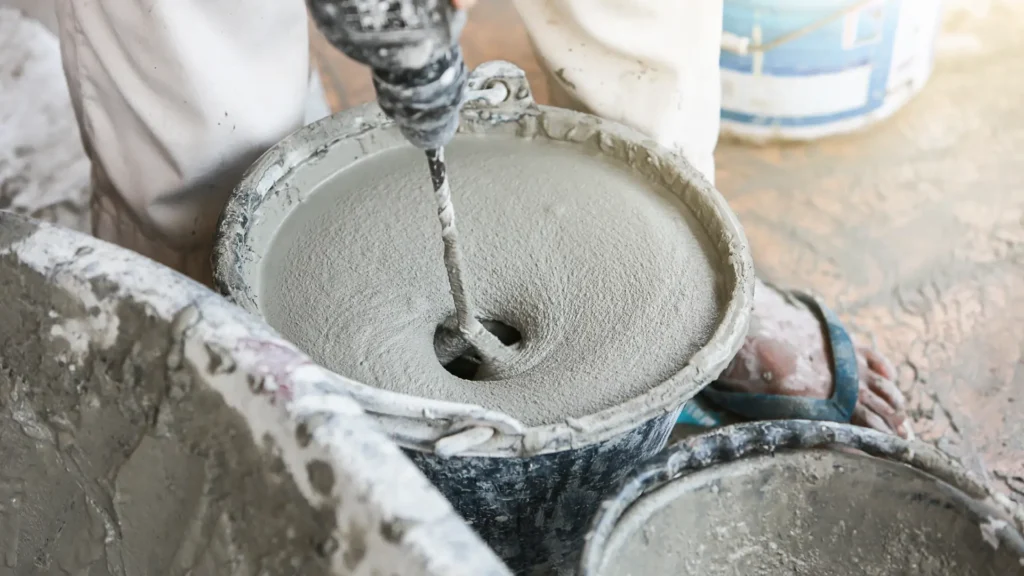
To mix concrete in a mixer, start by adding a small amount of water to the mixer, then add your aggregate and sand, followed by cement. Let the materials mix before slowly adding more water until the concrete reaches a thick, workable consistency. Mix for several minutes until the colour and texture are even, adjusting for Whangārei’s humid conditions by adding water gradually to avoid weakening the mix.
- What You’ll Need Before You Start (Tools & Materials)
- Choosing The Right Concrete Mix For Your Project
- Understanding Concrete Mixing Ratios
- Step-By-Step: How To Mix Concrete In A Mixer
- How To Tell If Your Concrete Is Mixed Properly
- Common Concrete Mixing Mistakes (And How To Avoid Them)
- Weather & Timing Tips For Whangārei
- Cleaning Your Concrete Mixer Properly (Often Forgotten)
- DIY vs Hiring A Local Whangārei Professional
- FAQs: About How To Mix Concrete In A Mixer In Whangarei
- Conclusion
What You’ll Need Before You Start (Tools & Materials)
Before you start mixing concrete, taking the time to prepare properly will make the entire process smoother, safer, and far more successful. Having the right tools and materials ready means you can focus on getting the mix right instead of scrambling mid-job, which often leads to rushed decisions and weaker concrete.
Essential Tools
The tools you use play a big role in how efficiently and accurately you can mix concrete. Even for small DIY projects, these basics make a noticeable difference.
- Concrete mixer: An electric or petrol mixer helps blend materials evenly and saves a lot of physical effort compared to mixing by hand. Electric mixers are ideal for smaller residential jobs, while petrol mixers suit larger or off-grid projects.
- Shovel: Used for loading materials into the mixer and moving mixed concrete where needed. A solid, square-edged shovel works best.
- Bucket or measuring container: Accurate measuring is key to strong concrete. Using the same container for each material helps keep ratios consistent.
- Wheelbarrow: Makes transporting mixed concrete easier and reduces spillage, especially if you’re working some distance from the mixer.
- Hose or water source: Clean, accessible water is essential, as you’ll need to add it gradually while mixing and for cleaning up afterward.
Materials
Choosing the right materials ensures your concrete sets properly and lasts over time. Whether you go with pre-mix or mix from scratch depends on your project and experience level.
- Pre-mix concrete bags: These are convenient and consistent, making them a popular choice for DIY projects. They already contain cement, sand, and aggregate in the correct proportions.
- Cement: Acts as the binding agent that holds everything together.
- Sand: Provides bulk and helps create a smooth, workable mix.
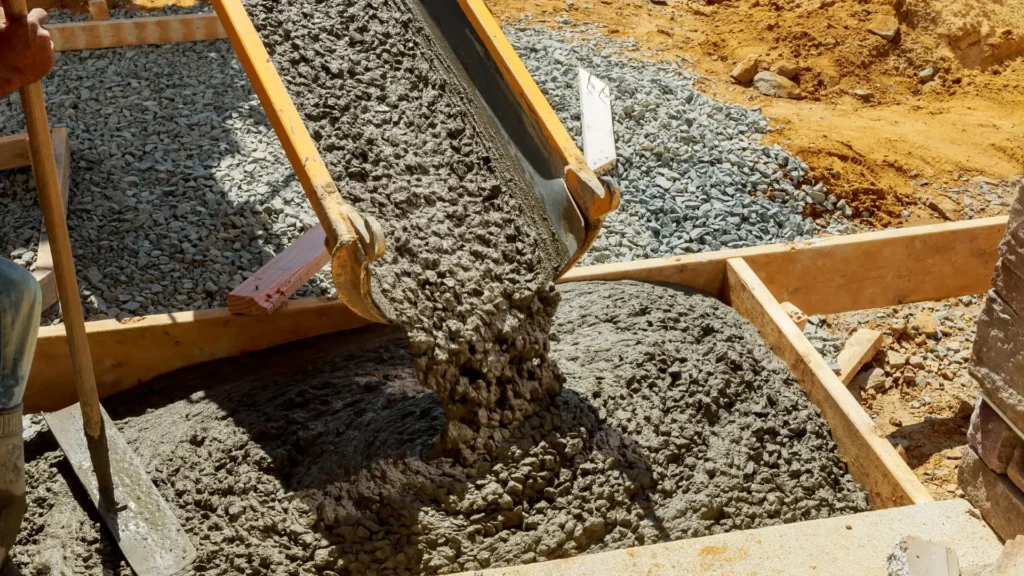
- Aggregate: Small stones or gravel that give concrete its strength.
- Clean water: Essential for activating the cement. Water should be free from dirt or debris, as impurities can weaken the mix.
Safety Gear (Often Overlooked)
Safety is easy to underestimate when working with concrete, but skipping protective gear can quickly turn a simple job into a painful lesson.
- Gloves: Protect your hands from cement, which is highly alkaline and can cause skin irritation or burns.
- Safety glasses: Prevent dust and splashes from getting into your eyes.
- Dust mask: Useful when handling dry cement, which can irritate your lungs if inhaled.
- Gumboots or sturdy footwear: Provide protection from spills and improve grip on wet or uneven ground.
Taking a few minutes to gather the right tools, materials, and safety gear sets you up for a far better result. With everything ready and within reach, you can mix confidently, work efficiently, and move on to the next step without unnecessary setbacks.
Choosing The Right Concrete Mix For Your Project
Choosing the correct concrete mix is one of the most important decisions you’ll make before starting any concrete job. The type of mix you use directly affects strength, durability, and how easy the concrete is to work with. Using the wrong mix can lead to cracking, weak spots, or poor finishes, particularly in Whangārei where moisture and ground conditions can influence how concrete performs over time.
Pre-Mixed Concrete Vs Mixing From Scratch
Before mixing begins, it’s important to understand the difference between pre-mixed concrete and mixing materials from scratch. While both methods can work, they are suited to different skill levels and project sizes.
- Pre-mixed concrete:
Pre-mixed concrete comes in bags with cement, sand, and aggregate already measured in the correct proportions. This option removes guesswork, saves time, and delivers consistent results. For DIYers in Whangārei, pre-mix is usually the best choice, especially for small to medium projects where accuracy and reliability matter more than minor cost savings. - Mixing from scratch:
Mixing concrete from scratch involves purchasing cement, sand, and aggregate separately and measuring each component yourself. While this can be more economical for large pours, it requires experience and precision. Incorrect ratios or excess water can significantly weaken the concrete, making this approach better suited to experienced builders rather than beginners.
For most homeowners, pre-mixed concrete offers a safer and more predictable outcome.
Common Projects And Recommended Mix Types
Different projects place different demands on concrete, so choosing the right mix helps ensure durability and long-term performance.
- Fence posts:
General-purpose or fast-setting concrete mixes are ideal for fence posts. They provide adequate strength while allowing posts to set quickly, which is useful when installing multiple posts in one session. - Pathways:
For garden paths and walkways, a general-purpose concrete mix designed for light foot traffic works well. These mixes are easy to finish and hold up well under regular use. - Small slabs:
Projects such as shed bases or small patios require a higher-strength concrete mix. These mixes are designed to handle weight and reduce the likelihood of cracking over time. - Repairs:
Concrete repair or patching mixes are best for fixing cracks, chipped edges, or damaged sections. They bond well to existing concrete and are formulated to cure properly in small applications.
Matching the concrete mix to the specific project improves both the quality of the finish and the lifespan of the work.
Local Availability In Whangārei
Access to the right concrete mix in Whangārei is generally easy, but knowing where to buy and what to check can prevent costly mistakes.
- Hardware stores:
Local hardware stores carry a range of pre-mixed concrete options suitable for most DIY projects. These products usually include clear instructions for water ratios and mixing times. - Local suppliers:
Specialist building suppliers may offer additional options such as higher-strength mixes or bulk quantities. These can be useful for larger projects or jobs with specific requirements. - Why checking bag instructions matters:
Concrete mixes vary between brands. Water requirements, mixing times, and curing recommendations are not always the same. Following the instructions on the bag is essential to achieve the intended strength and finish.
Choosing the right concrete mix from trusted local suppliers helps ensure your project runs smoothly. By selecting a mix suited to your skill level, project type, and Whangārei’s conditions, you set yourself up for strong, reliable results and a much easier build process.
Understanding Concrete Mixing Ratios
Getting concrete mixing ratios right is one of the most important steps in producing strong, long-lasting concrete, yet it is also one of the most confusing parts for beginners. The good news is that you do not need to be a builder or engineer to understand the basics. Once you know how the main ingredients work together and how water affects the mix, you can confidently prepare concrete that is easy to work with and durable once it sets.
Standard Concrete Ratio Explained Simply
The most commonly used concrete mixing ratio for general DIY projects is the 1:2:3 ratio, which refers to one part cement, two parts sand, and three parts aggregate. This ratio creates a balanced mix that is strong enough for most residential applications while still being easy to mix and place.
This standard ratio works well for projects such as:
- Fence posts: Provides enough strength to hold posts securely in the ground.
- Pathways and patios: Delivers durability without being overly rigid or brittle.
- Small slabs and repairs: Ideal for garden sheds, outdoor steps, and light-use areas.
The reason this ratio is so popular is that cement acts as the binding agent, sand fills the gaps and improves workability, and aggregate adds strength and structure. When these materials are combined correctly, the result is concrete that cures evenly and performs well over time.
Water Ratio The Most Common Mistake
Water is the ingredient that causes the most problems when mixing concrete. Many people assume that adding more water makes concrete better because it becomes easier to pour and spread. In reality, too much water weakens the concrete and reduces its long-term strength.
Concrete that is overly wet may look smooth at first, but once it cures, it is more likely to crack, crumble, or wear down quickly. The goal is to use just enough water to activate the cement and allow the mix to bind properly.
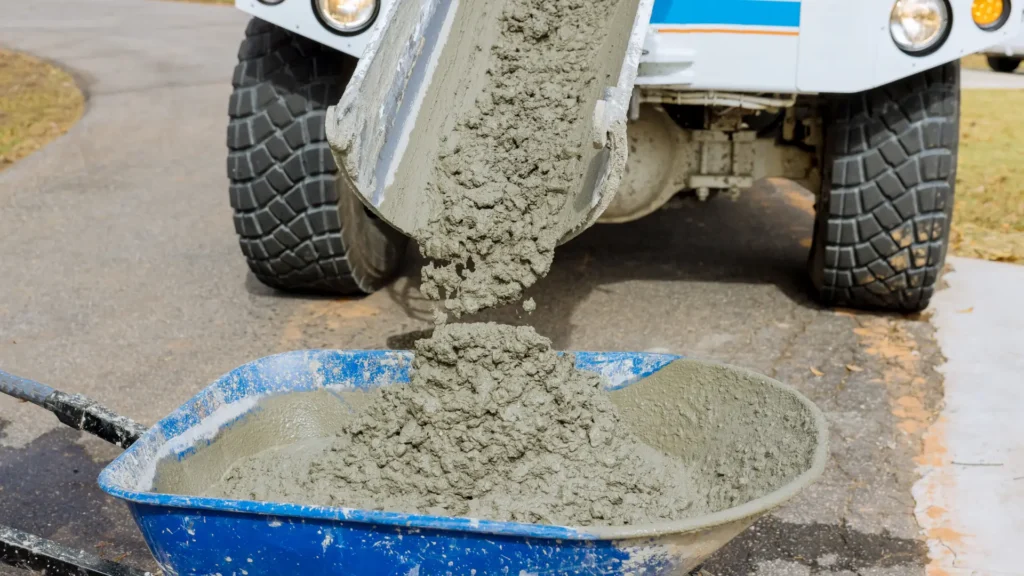
You should aim for a consistency that:
- Thick porridge: The mix should flow slowly rather than run freely.
- Holds shape but still workable: When lifted with a shovel, it should stay together without slumping or dripping.
Adding water gradually allows you to stop at the right point, giving you a mix that is strong, workable, and easier to finish cleanly.
Adjusting For Whangārei Conditions
Whangārei’s climate plays a bigger role in concrete mixing than many people realize. High humidity and frequent rainfall mean that sand and aggregate often contain moisture before you even start mixing. If you ignore this and add the same amount of water you would in dry conditions, the mix can quickly become too wet.
To compensate for local conditions, it is important to:
- Check moisture in aggregates: Damp sand may clump together, indicating it already contains water.
- Add water slowly: Start with less water than you think you need and increase gradually.
- Watch the mix, not the measurements: Visual consistency matters more than exact volumes in humid conditions.
By adjusting your approach based on Whangārei’s environment, you reduce the risk of weak concrete and improve overall results.
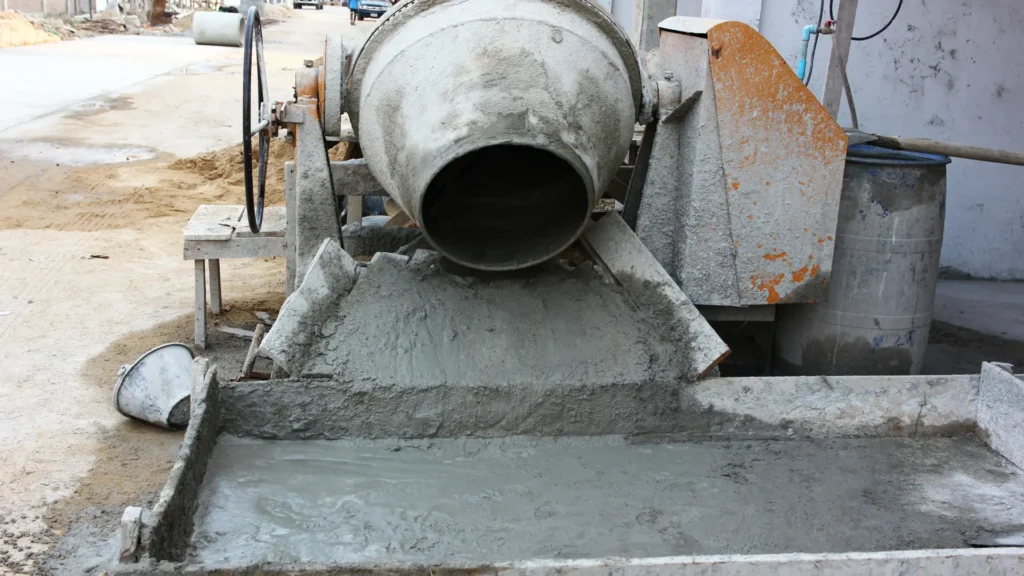
Step-By-Step: How To Mix Concrete In A Mixer
Mixing concrete in a mixer can feel overwhelming if you have never done it before, but once you understand the order and what to look for, it becomes a simple and reliable process. Following these steps will help you mix concrete correctly, avoid common mistakes, and achieve strong, workable results for DIY and small construction projects.
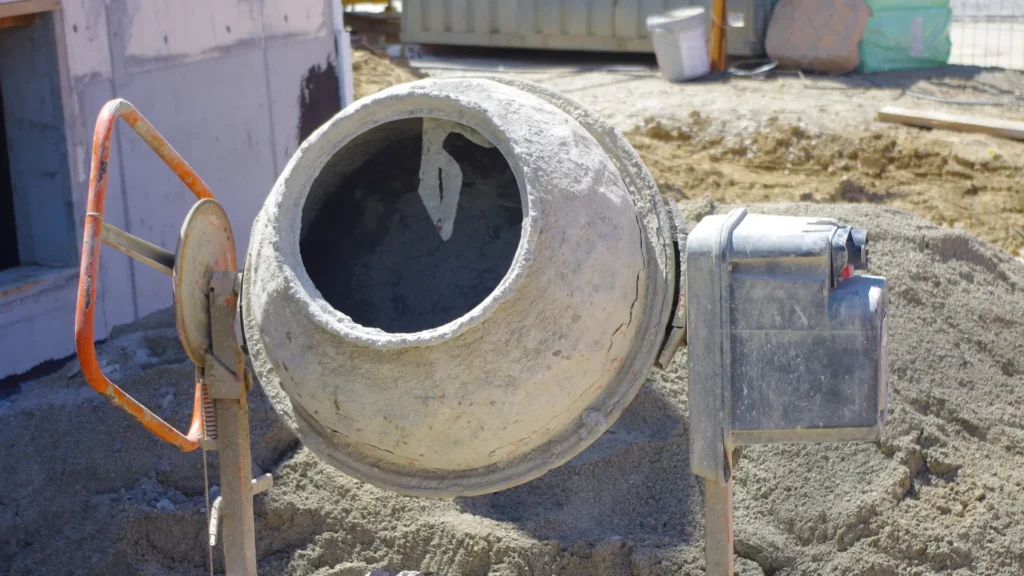
Step 1: Set Up Your Mixer Correctly
Before adding any materials, it is important to position your concrete mixer properly. A well-set mixer makes the entire process smoother and reduces physical strain.
- Flat, stable ground: Place the mixer on solid, level ground so it does not wobble or shift while running. This keeps the mix consistent and improves safety.
- Correct angle: Adjust the drum so it tilts slightly upward, allowing materials to tumble and mix instead of spilling out.
- Close to where concrete will be used: Position the mixer near your pour area to reduce the effort of moving heavy, wet concrete.
Taking a few minutes to set up correctly saves time and prevents unnecessary mess later on.
Step 2: Add Water First (Not Last)
Starting with water inside the drum is one of the simplest ways to improve mixing results and protect your equipment.
- Why this protects the mixer: Water coats the inside of the drum, preventing dry cement from sticking and reducing strain on the motor.
- How much water to start with: Begin with roughly half of the total water needed so you can adjust the consistency gradually.
This approach gives you better control and helps everything combine more evenly.
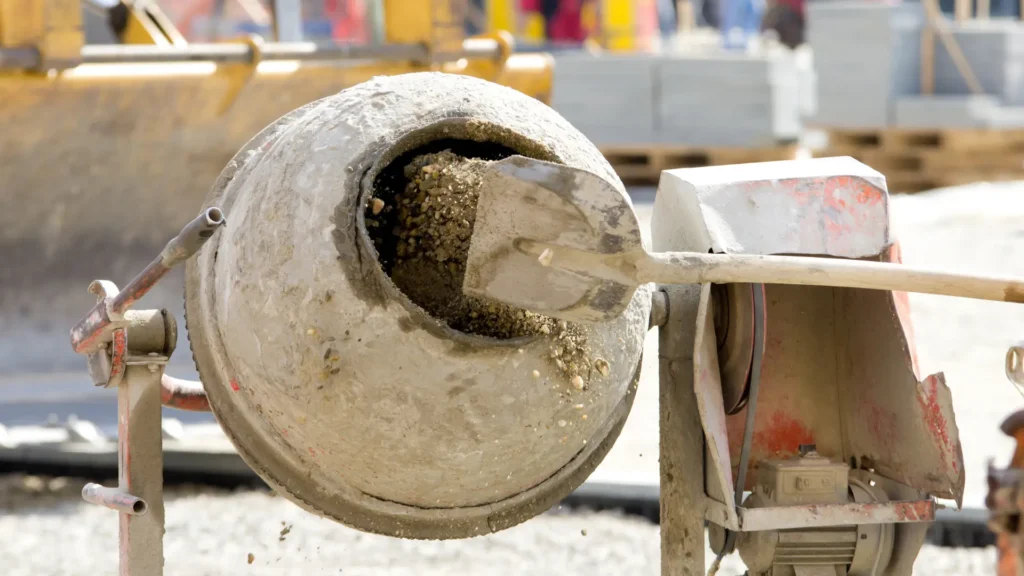
Step 3: Add Aggregates And Sand
With water already in the drum, you can now begin adding the bulk materials that form the structure of the concrete.
- Order matters: Add aggregate first, followed by sand, so the heavier materials distribute evenly through the water.
- Let it tumble briefly: Allow the mixer to rotate for a short time so the materials begin blending before moving on.
This step creates a solid base for the cement to bind properly.
Step 4: Add Cement Slowly
Cement should always be added with care to avoid uneven mixing and excessive dust.
- Avoid dust clouds: Pour cement in slowly to reduce airborne dust and prevent dry clumps from forming.
- Let it blend fully: Allow the mixer to run until the cement is fully incorporated and the colour starts to look consistent.
Adding cement gradually results in a smoother, stronger mix.
Step 5: Adjust Water Gradually
Fine-tuning the water content is where many people make mistakes, so patience is key at this stage.
- Visual and texture cues: The concrete should look smooth and cohesive, not dry and crumbly or overly runny.
- When to stop adding water: Stop once the mix holds its shape on a shovel but still slides off easily when tipped.
Always add water slowly, especially in humid conditions where materials may already contain moisture.
Step 6: Mix Time
Proper mixing time ensures all ingredients are evenly distributed and ready to use.
- Ideal mixing duration: Mix for around two to five minutes once all materials are added.
- Signs it’s ready to use: The concrete should have a uniform colour, even texture, and no visible dry patches.
Avoid over-mixing, as this can weaken the concrete and make it harder to work with.
By following these steps and paying attention to how the concrete looks and feels, you can confidently mix concrete in a mixer and achieve reliable results. With a little practice, the process becomes straightforward and helps set your project up for a strong, long-lasting finish.
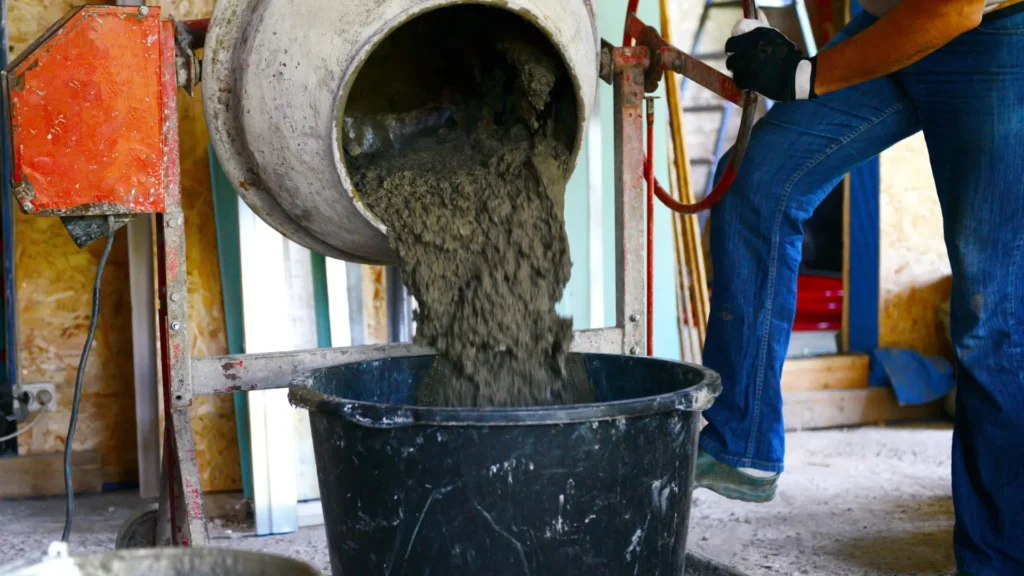
How To Tell If Your Concrete Is Mixed Properly
Knowing whether your concrete is mixed correctly is just as important as following the right steps in the mixer. Even if you’ve measured everything carefully, a quick visual and hands-on check can save you from weak concrete, cracking, or poor finishes. The good news is that you don’t need professional experience to assess your mix, just a few simple indicators you can spot straight away.
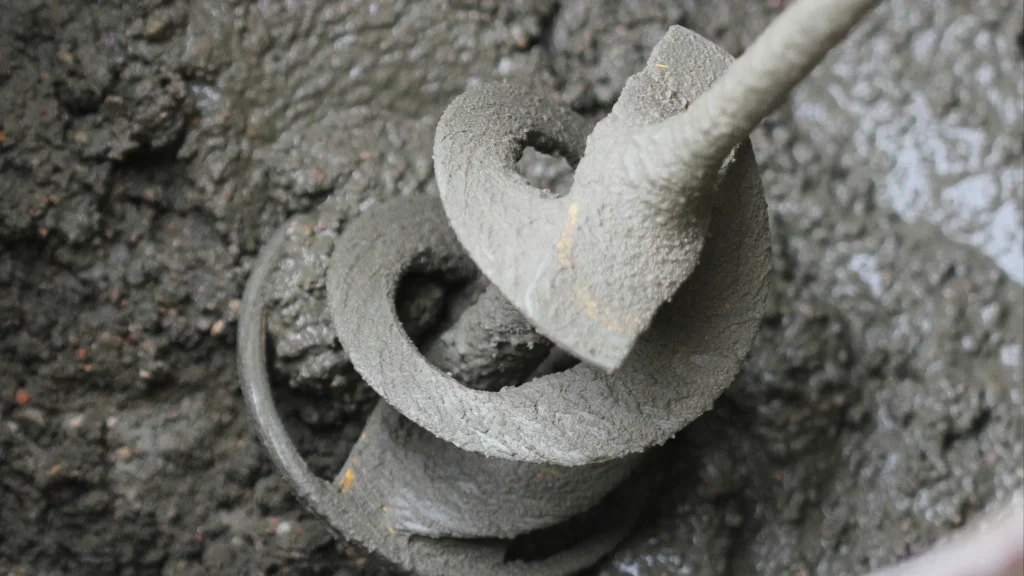
Texture Indicators
The texture of properly mixed concrete should be workable without being runny. This is one of the easiest ways to tell if you’re on the right track. Concrete that is too dry will be hard to place and won’t bond well, while concrete that is too wet loses strength as it cures.
When mixed correctly, the concrete should:
- Hold together when moved with a shovel
- Feel dense and cohesive rather than gritty or watery
- Spread easily without separating into water and solids
If the mix looks soupy or water pools on the surface, it needs more dry material. If it crumbles or looks dusty, add small amounts of water and mix again.
Colour Consistency
Colour is another strong indicator that your concrete is properly mixed. A good mix will have a uniform colour throughout, usually a consistent grey tone depending on the materials used. Patchy colouring often means the cement has not fully blended with the sand and aggregate.
Watch for these signs:
- Even colour with no light or dark streaks
- No visible clumps of dry cement or sand
- A consistent appearance from top to bottom of the mix
If the colour looks uneven, let the mixer run a little longer and check again before using the concrete.
How It Should Behave On A Shovel
A simple shovel test can tell you a lot about your concrete mix. Scoop some concrete out of the mixer and gently tilt the shovel to see how it behaves. This gives a clear idea of whether the water content is right.
Properly mixed concrete should:
- Sit on the shovel without sliding off immediately
- Slowly slump when tilted, rather than pouring
- Keep its shape while still being easy to place
If it slides off like liquid, it is too wet. If it stays stiff and doesn’t move at all, it is too dry and will be difficult to work with.
Quick Pass Or Fail Checklist
Before you start pouring, run through this quick checklist to confirm your mix is ready to use:
- Texture: Thick and workable, not soupy or crumbly
- Colour: Even and consistent throughout the mix
- Shovel Test: Holds shape and slumps slowly when tilted
- Mixing Time: Fully blended with no dry pockets
- Workability: Easy to place without excessive effort
If your mix passes all of these checks, you can be confident it is ready for use.
Getting this final check right can make a big difference to the strength and finish of your concrete. Taking a few extra minutes to assess the mix helps ensure your hard work pays off and your project lasts as it should.
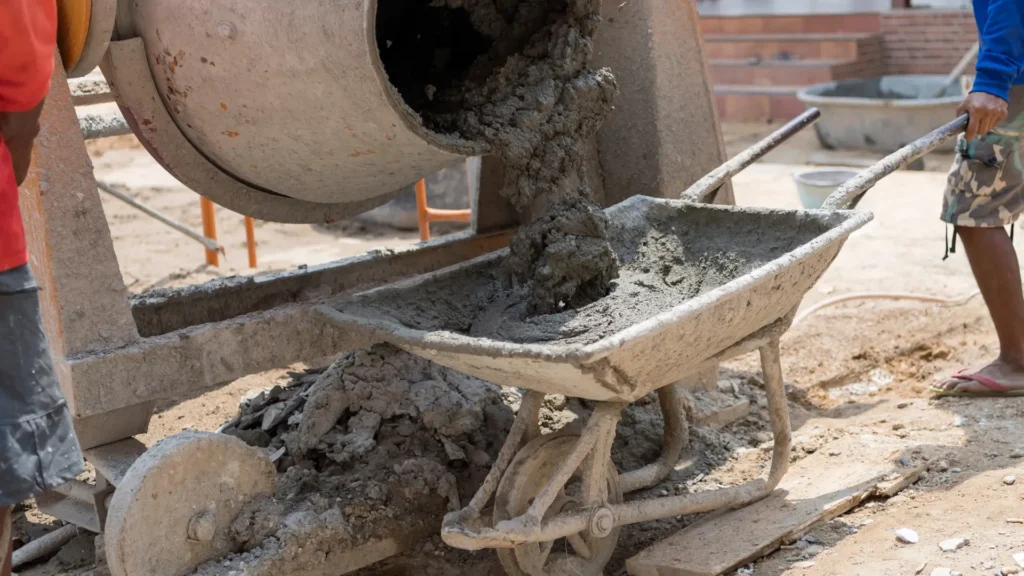
Common Concrete Mixing Mistakes (And How To Avoid Them)
Mixing concrete might seem straightforward, but small mistakes can lead to weak, cracked, or short-lived results. Many concrete failures happen not because of poor materials, but because of avoidable errors during mixing. Understanding these common mistakes, especially in Whangārei’s local conditions, can save you time, money, and frustration while helping you achieve strong, reliable concrete.
Common Errors
- Adding Too Much Water:
This is the most common mistake people make when mixing concrete. While wetter concrete may seem easier to work with, excess water significantly reduces strength and durability. Concrete should be workable, not runny. Always add water slowly and stop once the mix holds its shape while still being easy to shovel or pour. - Not Measuring Materials:
Guessing quantities often leads to inconsistent results. Too much sand weakens the mix, while too much cement can cause cracking. Measuring materials using a bucket or consistent container helps maintain the correct ratio and ensures uniform strength throughout the concrete. - Over-Mixing Or Under-Mixing:
Under-mixed concrete results in uneven color and weak spots, while over-mixing can cause the materials to separate and reduce workability. Aim to mix until the color and texture are consistent, usually a few minutes, without letting the mixer run unnecessarily long. - Letting Concrete Sit Too Long:
Concrete begins setting as soon as it is mixed. Letting it sit in the mixer or wheelbarrow for too long can make it stiff and difficult to place properly. Always plan your pour so the concrete is used immediately after mixing. - Ignoring Weather Conditions:
Weather plays a major role in concrete quality. Heat can cause concrete to dry too quickly, while rain can add unwanted water. Always consider the forecast and adjust your timing and water use accordingly.
Whangārei-Specific Mistakes
- Mixing During Heavy Rain:
Whangārei’s rainfall can quickly ruin a concrete mix. Rain adds uncontrolled water, weakening the concrete and affecting the finish. If heavy rain is expected, it is best to delay mixing or ensure the area is properly sheltered. - Not Accounting For Damp Sand:
Sand in Whangārei often contains moisture due to humidity and rain. Using damp sand without adjusting water amounts can lead to overly wet concrete. Reduce added water slightly when materials are already moist and mix slowly to assess consistency.
Avoiding these mistakes makes a noticeable difference in the final result. With careful measuring, patience, and attention to local conditions, you can produce concrete that is strong, durable, and built to last. Taking the time to get the mix right is one of the best ways to ensure your project succeeds from the start.
Weather & Timing Tips For Whangārei
Whangārei’s coastal climate plays a bigger role in concrete work than many people expect. Warm temperatures, high humidity, and sudden rain can all affect how concrete mixes, sets, and ultimately performs. Understanding how to work with local weather conditions will help you avoid weak concrete, surface issues, and unnecessary rework.
Best Conditions For Mixing Concrete
Concrete performs best when mixed and poured under stable, mild conditions. In Whangārei, this usually means planning your work around dry days with moderate temperatures.
- Ideal temperature range: Between 10°C and 25°C, which allows concrete to cure evenly without drying too fast
- Dry weather: Clear or lightly overcast days help prevent excess moisture from affecting the mix
- Low wind: Reduces rapid surface drying, especially for slabs or exposed pours
When conditions are right, concrete is easier to work with, finishes better, and gains strength as intended.
What To Do In Humid Or Rainy Weather
Humidity is a common challenge in Northland, and it directly affects moisture levels in your materials. Sand and aggregate often hold extra water, which can throw off your mix if you are not careful.
- Adjust water slowly: Add less water than usual and increase only if needed
- Check material moisture: Damp sand means you need less added water
- Protect the mix: Keep materials covered and shield fresh concrete from rain
If light rain is expected later, having plastic sheeting ready can save a pour that would otherwise be compromised.
When To Postpone A Pour
Sometimes the best decision is to wait. Pouring concrete in poor conditions often leads to cracking, weak spots, or surface damage.
- Heavy rain forecast: Rain can wash cement out of the mix and ruin the finish
- Very high humidity: Slows curing and increases the risk of surface issues
- Extreme heat: Causes concrete to set too quickly and lose strength
Postponing by a day or two is usually far cheaper than fixing failed concrete later.
Early Morning Vs Midday Pours
Timing your pour during the day can make a noticeable difference in Whangārei’s climate.
- Early morning pours: Cooler temperatures, less wind, and more control over curing
- Midday pours: Higher heat and evaporation, which can cause rapid setting and cracking
- Late afternoon pours: Riskier if evening rain or temperature drops are expected
For most DIY projects, early morning is the safest and most forgiving option.
Taking Whangārei’s weather into account is one of the simplest ways to improve your concrete results. With a bit of planning and patience, you can work around local conditions and ensure your concrete sets strong, durable, and built to last.
Cleaning Your Concrete Mixer Properly (Often Forgotten)
Cleaning your concrete mixer is one of those steps that’s easy to rush or skip once the job is done, but it has a big impact on how long your equipment lasts and how well it performs next time. Taking a few extra minutes to clean the mixer properly can save you hours of frustration, costly repairs, or even the need to replace the machine altogether.
Why Immediate Cleaning Matters
Concrete begins to set quickly, and once it hardens inside the drum or on the paddles, it becomes extremely difficult to remove. Cleaning the mixer straight after use prevents buildup and keeps all moving parts working as they should.
Key reasons to clean immediately:
- Prevents hardened concrete buildup: Dried concrete can reduce mixing efficiency and throw the drum off balance.
- Extends the life of the mixer: Clean equipment suffers less wear on paddles, bearings, and motor components.
- Saves time and effort later: Fresh concrete residue is far easier to remove than hardened cement.
- Ensures consistent mixes: Old concrete stuck inside the drum can contaminate future batches.
Step-By-Step Cleaning Process
A proper cleaning routine does not need to be complicated, but it does need to be done methodically while the concrete is still wet.
Follow these steps:
- Rinse the drum immediately: Add water to the drum as soon as you finish pouring the concrete.
- Let the mixer run: Turn the mixer on and allow the water to wash around the inside for a few minutes.
- Use a shovel or stiff brush: Carefully remove any remaining concrete stuck to the sides or paddles while the drum is rotating slowly or turned off.
- Empty the slurry: Tip out the dirty water and residue into an appropriate disposal area.
- Final rinse: Give the drum one last rinse to ensure no cement film is left behind.
What Not To Do When Cleaning a Mixer
Many mixer problems come from simple mistakes made during cleanup. Avoiding these can prevent permanent damage to your equipment.
Common mistakes to avoid:
- Do not let concrete harden inside the mixer: Once it sets, removal often requires chiseling or hammering, which can damage the drum.
- Do not use excessive force: Striking the drum or paddles can bend metal parts and affect performance.
- Do not wash residue into drains: Concrete can harden in pipes and cause blockages.
- Do not postpone cleaning until later: Even waiting an hour can make cleanup significantly harder.
Disposal Tips for Concrete Waste
Concrete waste needs to be disposed of responsibly, especially leftover slurry and rinse water.
Safe disposal tips:
- Pour waste onto bare ground where allowed: Let it dry and harden before breaking it up and disposing of it properly.
- Use a designated waste container: Many DIYers use an old tub or wheelbarrow to let residue set.
- Check local Whangārei guidelines: Some areas have specific rules for disposing of construction waste.
- Never dump into stormwater systems: This can cause environmental and infrastructure damage.
Cleaning your concrete mixer properly may not feel like the most exciting part of a DIY project, but it is one of the most important. A clean mixer is easier to use, lasts longer, and helps ensure better results every time you mix concrete, making the effort well worth it once the job is done.
DIY vs Hiring A Local Whangārei Professional
Deciding whether to mix and pour concrete yourself or hire a local professional in Whangārei depends on the size of the project, your skill level, and the long-term outcome you expect. Some jobs are well within reach for a careful DIYer, while others are better left to experienced hands to avoid costly mistakes and compliance issues.
When DIY Makes Sense
DIY concrete work can be a practical choice for smaller, low-risk projects where precision and structural strength are not critical. Many homeowners in Whangārei choose this route for simple outdoor tasks.
- Project size: Small jobs such as fence posts, garden edging, stepping stones, or short pathways are ideal for DIY.
- Budget limits: Mixing concrete yourself can reduce labour costs when working with a tight budget.
- Time flexibility: DIY works best when you can take your time and wait for suitable weather conditions.
- Skill confidence: If you are comfortable measuring materials and following instructions, basic concrete mixing is achievable.
DIY projects are most successful when expectations are realistic and the work does not affect drainage or structural safety.
When It’s Better to Call a Pro
There are clear situations where hiring a local Whangārei professional is the safer and more cost-effective decision. Concrete errors are difficult to correct once the material sets.
- Large-scale pours: Driveways, house slabs, patios, and retaining walls require experience and accurate execution.
- Structural importance: Any concrete that supports buildings, vehicles, or heavy equipment should be handled professionally.
- Drainage and slope control: Poor levelling can lead to water pooling or runoff problems, which are common in Whangārei’s climate.
- Finish quality: Professionals deliver smoother finishes, correct curing, and better long-term durability.
For these projects, professional work often prevents expensive repairs and ensures reliable results.
Cost vs Effort Comparison
The real cost of concrete work is not just financial. Time, physical effort, and the risk of mistakes all play a role in deciding between DIY and professional services.
- DIY costs: Materials, mixer hire, tool rental, personal time, and potential rework if mistakes occur.
- Professional costs: Labour, expertise, efficiency, and accountability for the finished work.
- Physical effort: Concrete mixing and pouring is physically demanding and time-sensitive, especially in warm or humid conditions.
DIY may be cheaper for small tasks, but professional services often provide better overall value for larger or long-term projects.
Local Regulations and Expectations in Whangārei
Some concrete projects in Whangārei must meet local building requirements, particularly when they involve permanent structures or drainage changes. Understanding these expectations before starting is important.
- Building consent: Larger slabs, foundations, or structural concrete may require council approval.
- Site preparation standards: Proper base preparation and compaction are often expected.
- Environmental considerations: Managing water runoff and soil stability is important in Northland conditions.
Before starting any major concrete project, checking local council guidelines can help avoid compliance issues and delays.
Ready to get your concrete project done right the first time? Explore more expert DIY guides, local tips, and practical resources on our website to help you save time, avoid costly mistakes, and build with confidence in Whangārei. Click through now and get the know-how you need before you start mixing.
References
- How To Mix Concrete In A Mixer For DIY Projects
https://concretecaptain.com/how-to-mix-concrete-in-a-mixer-2/ - How To Use A Concrete Mixer: Step-By-Step Guide And Tips
https://www.lowes.com/n/how-to/how-to-use-a-cement-mixer - How To Properly Mix Concrete: Techniques And Best Practices
https://www.columbiaconcretesupply.com/the-ultimate-guide-to-mixing-concrete-tips-techniques-and-best-practices/ - Concrete Mixer Guide For Beginners
https://groundedinconcrete.com/how-do-you-use-a-concrete-mixer/ - How To Mix Concrete In A Mixer: Complete Guide For DIY Enthusiasts
https://concretecaptain.com/how-to-mix-concrete-in-mixer/
FAQs: About How To Mix Concrete In A Mixer In Whangarei
The correct way to mix concrete in a mixer is to add water first, then aggregate and sand, followed by cement, mixing until the consistency is even and workable without being too wet.
Add water gradually. Start with a small amount and slowly increase until the concrete reaches a thick, workable consistency, as too much water weakens the final result.
Yes, beginners can successfully mix concrete using a mixer by following clear steps, measuring materials properly, and avoiding common mistakes like overwatering.
Pre-mixed concrete bags are often best for DIY projects in Whangarei because they are easy to use, consistent, and readily available at local suppliers.
Concrete should typically mix for 2 to 5 minutes until the colour and texture are uniform and all materials are fully combined.
Yes, Whangarei’s humid and sometimes wet conditions mean materials may already contain moisture, so water should always be added slowly and carefully.
Concrete that is too wet will be weaker, more prone to cracking, and less durable once cured, even if it looks easier to work with.
Yes, small amounts of concrete can be mixed by hand, but using a mixer saves time, reduces effort, and produces a more consistent mix for most projects.
Concrete should be used immediately after mixing, ideally within 30 minutes, before it begins to set and lose strength.
Clean the mixer straight away by rinsing it with water and running it briefly to remove residue, as dried concrete is very difficult to remove later.
Conclusion
Mixing concrete in a mixer does not have to feel intimidating, especially when you take the time to prepare properly and follow proven steps that suit Whangarei conditions. With the right materials, accurate measurements, and a steady approach, you can achieve strong, long-lasting concrete that holds up well over time and looks good once finished. Confidence comes from understanding the process and avoiding shortcuts, because good preparation almost always leads to better results and fewer mistakes. If this guide helped you, consider bookmarking it or sharing it with someone planning a similar project so they can benefit too. And if you ever feel unsure about your mix, timing, or project scope, reaching out to a local expert or exploring related DIY guides can give you the extra clarity you need before getting started.
About the Author:
Mike Veail is a recognized digital marketing expert with over 6 years of experience in helping tradespeople and small businesses thrive online. A former quantity surveyor, Mike combines deep industry knowledge with hands-on expertise in SEO and Google Ads. His marketing strategies are tailored to the specific needs of the trades sector, helping businesses increase visibility and generate more leads through proven, ethical methods.
Mike has successfully partnered with numerous companies, establishing a track record of delivering measurable results. His work has been featured across various platforms that showcase his expertise in lead generation and online marketing for the trades sector.
Learn more about Mike's experience and services at https://theleadguy.online or follow him on social media: